


As the seasons change and the desire for a fresh perspective within our homes takes hold, many homeowners turn to the transformative power of a fresh coat of paint. With the right guidance and a touch of creativity, do-it-yourself (DIY) home painting can be a rewarding and cost-effective project that revitalizes your living space. We’ve gathered insights from experts and industry sources to provide you with a comprehensive guide to achieving a flawless finish on your own.
Preparation is Key
Before diving into the world of DIY painting, it’s crucial to lay a solid foundation. According to renowned interior designer Jane Smith, “The success of a painting project hinges on thorough preparation.” Properly priming the walls will ensure even paint absorption and colour uniformity. Start by cleaning surfaces with a mixture of mild detergent and water to remove dirt and grease buildup and repair any cracks or imperfections using a high-quality spackling compound.
Choosing the Right Tools and Paint
Selecting the appropriate tools can make a significant difference in the outcome of your project. Denise Sabia, founder of The Painted Home blog, emphasizes the importance of investing in high-quality brushes and rollers. “Using premium tools helps achieve smoother finishes and reduces streaks”, she says. It’s recommended you opt for low- or no-VOC paints to promote indoor air quality.
Testing Colours and Techniques
Experimenting with different colour options can be both exciting and daunting. To assist with this decision-making process, designer Emily Davis suggests testing paint samples on small sections of your walls. “Observing how natural and artificial light affect the colours throughout the day is essential,” adds Davis. Additionally, practising different painting techniques, such as sponging or ragging, can add depth and texture to your walls.
Mastering the Brush Strokes
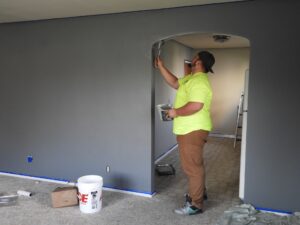
The technique used when applying paint can greatly impact the final look. Sibulelo Nkosi, a professional painter with over 15 years of experience, recommends using long, smooth brush strokes in the direction of the wood grain for a consistent finish. For a professional-looking paint job, Brian advises you to maintain a “wet edge” while painting to prevent visible brush marks and allow the paint the blend. This means not letting the paint dry on one patch before you start painting the section next to it.
A Feathered Touch for Polished Corners
One of the trickiest parts of painting edges is achieving perfectly sharp corners. To achieve this, expert painter Michael Thompson recommends a feathering technique. “Gently feather the brush strokes at the corner, gradually tapering the paint out,” suggests Thompson. This technique blends the paint seamlessly, preventing harsh lines and creating a polished look. As you approach the corner, lighten your pressure on the brush and use short, controlled strokes to create a gradual transition.
Patience and Precision
As the saying goes, “Rome wasn’t built in a day,” and neither is a perfectly painted room. Experts unanimously stress the importance of taking your time and being patient throughout the process. “Allow each coat to dry thoroughly before applying the next,” advises Rebecca Turner, a DIY home improvement enthusiast. Rushing can lead to uneven application and undesirable results.